Tuesday, December 22, 2009

Cranberry Scones

One of my families favorite Christmas traditions is to have high tea.  The kids love getting dressed up and going to a special hotel to have high tea.  One bakery item that is at every high tea are mouth watering scones made with real cream and butter.  My family likes to practice this ritual of high tea at home during the Christmas holiday.  Today the kids decided that we needed to have high tea so my daughter and I set off to make Christmas cranberry scones.  This recipe was taken from the cooking network sight under Alton Brown.  I altered the recipe by using whole wheat pastry flour for regular white flour and used all butter instead of shortening.  I doubled the recipe so I could freeze some of the scones for Christmas morning. If you want to freeze the dough just cut out the scones and place them on a parchment lined cookie sheet and freeze them until you are ready to bake them.

Cranberry Scones:

Pre-heat the oven:  375 degrees
Makes 12 scones

2 cups whole wheat pastry flour
4 teaspoons baking powder
3/4 teaspoon salt
1/3 cup sugar
6 tablespoons cold butter, cut into small pieces
3/4 cup cream
1 egg
1/2 cup dried cranberries
1/2 cup water

In a large bowl, place the whole wheat pastry dough, baking powder, salt and sugar and mix together.  Add the cold butter pieces to the flour mixture. Cut the butter into the flour mixture with a pastry knife or your fingers.  The flour mixture should resemble small pea size shapes.  Mix the cream and the egg together and then add them to the flour mixture.  In a small microwaveable bowl add the 1/2 cup dried cranberries with 1/2 cup water.  Heat the cranberries and water in the microwave for 1 minute.  Let the cranberries absorb the hot water for 5 minutes then drain the water off the cranberries.  Add the drained cranberries to the scone batter and mix together.  Turn the dough onto a floured surface and roll the dough out with a rolling pin.  The dough will be sticky so make sure everything is well floured.  Roll the dough out and cut them with either a biscuit cutter or Christmas cookie cutters (I used a Christmas tree and a star cutter).  Bake the scones on a parchment lined cookie sheet at 375 degrees for 15 minutes.  The scones should be golden brown when they are finished.  Remember is you want to freeze some of the scones just freeze the scones on a parchment lined cookie sheet until you are ready to bake them.


Cranberry Scone Batter


Cutting the Cranberry Scone Dough with Christmas Cutters


Cranberry Scone Dough on a Cookie Sheet


Cranberry Scones

Fried Chicken Legs

There is nothing more satisfying than sinking your teeth into homemade fried chicken.  I made this recipe once for my daughters girl scout leader and her family in appreciation for taking the girl scouts on a two night overnight trip.  Her girl scout leader said she could not wait a second more and promptly eat the fried chicken legs over the kitchen sink. If you are looking for an inexpensive and mouth watering recipe for fried chicken this is it.  I originally found out about this recipe from Martha Stewart but I did not write down the recipe when I saw Martha Prepare this recipe on t.v. several years ago. I have changed this recipe so it is healthier by using whole wheat flour, 1% buttermilk and canola oil to fry the chicken.

Fried Chicken Legs:
Pre-heat: Canola Oil in Large Frying Skillet or Iron Skillet:

8 chicken legs
2 cups whole wheat flour
2 teaspoons cinnamon
2 teaspoons salt plus additional salt for chicken
1 teaspoon fresh pepper plus additional pepper for chicken
1 1/4 cups buttermilk 1%
Canola oil for frying

In a large iron skillet or large frying pan pour the canola oil into the pan.  The oil should be 1/3 of the way up the side of the frying pan.  Heat the oil on medium heat until hot but not smoking (you should see little bubbles coming up from the bottom of the pan when it is hot).  When the oil is getting up to temperature, rinse the fresh chicken legs under cold water and then pat the legs dry with a paper towel.  Salt and pepper the chicken legs on both sides.  In a large bowl mix the whole wheat flour, 2 teaspoons of salt, 1 teaspoon fresh pepper and 2 teaspoons of cinnamon together.  In another bowl pour the 1%buttermilk into the bowl. Dredge a chicken leg into the flour mixture and shack off any extra flour.  Place the leg into the buttermilk and allow to drain any extra buttermilk off the leg.  Dredge the leg into the flour mixture for the 2nd time and shake off any extra flour.  Repeat the above directions for the other 7 chicken legs.  Finally place 4 chicken legs into the hot oil and cook for 6 minutes on each side, then turn and cook for another 6 minutes.  Cook the chicken until it is a golden brown on all sides or until it reaches an internal temperature of 165 degrees.  Do not over crowd the pan or the chicken will steam instead of fry leaving the skin soggy and not crispy.


Buttermilk Bowl and Flour Bowl 


Frying the Chicken Legs In Canola Oil


Fried Chicken Legs

Monday, December 21, 2009

Fresh Thyme Biscuits

My kids are out of school for the Christmas holiday so we are having fun in the kitchen cooking.  One of my kids favorite things to make with me are biscuits.  Tonight we tried something new and add some fresh thyme to these southern biscuits.  My kids also wanted to use white flour to make these biscuits so we gave it a try. Everyone seemed to enjoy the biscuits and even Brownie my dog had a smile on his face after sampling the biscuits.  The original recipe for the biscuits was taken from "Touch -of-Grace" and Cookwise by Shirley Corriher. I have changed this recipe to make it healthier and tried to give the biscuits a unique flavor.  Feel free to make these biscuits with white bread flour or whole wheat flour.

Thyme Biscuits:

Pre-heat Oven:  475 degrees
Makes:  8 biscuits

1 1/2 cups white organic bread flour or whole wheat bread flour
1 tablespoon baking powder
1/2 teaspoon salt
2 tablespoons organic cane sugar
3 tablespoons cold butter cut into small pieces
1 1/4 cup buttermilk 1%
2 teaspoons fresh thyme, chopped
1 cup white organic bread flour (shaping the biscuits) or whole wheat bread flour
2 tablespoons melted butter

In a bowl, combine the flour, baking powder, salt and sugar.  Cut the small pieces of cold butter into the flour mixture with a pastry knife or your hands.  The butter and flour should look like small pea size lumps.   Slowly add the buttermilk and stir just until the buttermilk has been incorporated with the flour.  In a small bowl add the 1 cup of bread flour.  Spray a 9 inch round pan with cooking spray.  Take an ice cream scoop and dip it into the biscuit dough then with your fingers remove the dough off the ice cream scoop and place it into the bowl of flour.  Shake off any extra flour from the dough and place the flour coated dough into the pan.  Repeat the above directions until all the dough has been used.  Melt the 2 tablespoons of butter in a small bowl in the microwave.  Using a pastry brush, brush the melted butter over the top of all the biscuits.  Bake at 475 degrees for 12-15 minutes or until golden brown.


Cutting the Butter into the Flour with the Pastry Knife


Measuring the Buttermilk


Scooping the Biscuit Dough Into the Flour 


Buttering the Biscuits Before They Go Into the Oven


Cooked Biscuits


Fresh Thyme Biscuits


Roasted Cauliflower with Fresh Oregano and Garlic

My son George loves my roasted cauliflower so tonight I tried roasting the cauliflower with fresh oregano.  Everyone in the family seemed to like the fresh oregano and garlic.  The fresh herbs add an Italian twist to this vegetable.


Roasted Cauliflower with Fresh Oregano and Garlic:

Pre-heat Oven:  425 degrees
Serves:  5

2 cloves fresh garlic crushed
1 tablespoon fresh oregano chopped
3 tablespoon virgin olive oil
1 head of cauliflower chopped in small pieces
1 teaspoon kosher salt
fresh pepper

Wash and remove the extra leaves of the cauliflower.  Cut the cauliflower in half and remove the hard stem in the middle.  Cut the rest of the cauliflower into small bite size clumps.  In a bowl toss the crushed garlic, fresh oregano, cauliflower, olive oil, salt and pepper. Line a cookie sheet with foil and distribute the cauliflower evenly over the pan.  Roast the cauliflower in a 425 degree oven for 30 minutes.  Stir the cauliflower after the first 15 minutes to ensure that all the cauliflower pieces are evenly browned then place back into the oven to finish roasting the final 15 minutes.


Head of Cauliflower with Fresh Oregano


Cauliflower Ready to Go Into the Oven


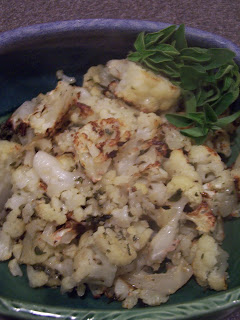
Roasted Cauliflower with Fresh Oregano and Garlic

Sunday, December 20, 2009

Christmas Baklava

I have been making baklava since I was 10 years old when my neighbor in Florida showed me how to make it.  It was a joy this year to make baklava with my three kids.  The kids just loved buttering each delicate piece of phyllo dough and sampling the dough as we placed layer after layer of phyllo sheets into the pan.  The syrup is fun to make with rich honey and cinnamon sticks. Then there are nuts, nuts and more nuts.  You can pick your favorite nut to make in this savory dish.  Traditionally the Greeks use walnuts to make this dish but since I am allergic to walnuts and so is my daughter we make the dish with either pecans or almonds.  This year I made two batches of baklava. The first batch I made with pecans and the second batch I made with almonds.  This dish is festive so I will be serving mine for Christmas dessert.  You can also make this dish up ahead of time and store it in a cool dry place for up to three days.  The original recipe comes from the Baking Book from Linda Collister and Anthony Blake.  You can find phyllo dough in the freezer section by the desserts at your local grocery store.

Baklava:

Pre-heat oven:  350 degrees
Thaw the phyllo dough in the refrigerator
Makes:  24 pieces

1 lb. 2 oz phyllo pastry dough
3 1/4 cups finally chopped pecans or almonds
2 tablespoons organic cane sugar
1 teaspoon ground cinnamon
1/2 cup melted butter

Syrup:
1 2/3 cups organic cane sugar
1 1/4 cups water
2 cinnamon sticks
3 teaspoons lemon juice
4 tablespoons honey

Finely chop the almonds or pecans by hand or in a food processor.  In a bowl mix the nuts, ground cinnamon and 2 tablespoons of sugar. Set aside.

Melt the 1/2 cup butter in a small microwaveable bowl.  Remove the plastic wrap from the phyllo dough and lay the dough flat on a counter.  Place a moist towel over the dough when you are not working with it to keep the dough from drying out.  In a 9 X 14 inch pan place the 1st sheet of phyllo dough down in the pan.  With a pastry brush, brush the melted butter over the entire phyllo sheet.  Repeat the above directions until you have six buttered phyllo sheets.  Add 1/3 of the nut mixture and spread evenly over the phyllo dough.  Then add 3 more sheets of buttered phyllo dough.  Add the other 1/3 of the nuts and another 3 layers of phyllo dough.  Finally add the last of the nuts and place 5 more buttered phyllo sheets on top.  With a sharp knife cut the phyllo dough in rows (4x 6).  Bake the baklava at 350 degrees for 15 minutes.  Then increase the heat to 375 degrees for another 15 minutes.  The baklava is done when the phyllo dough is a golden brown.  While the baklava is cooking you can make the syrup.

Making the Syrup:
In a Saucepan on medium heat add the sugar, water, honey, lemon juice and cinnamon sticks and stir.  Bring the syrup up to a boil then lower the temperature to low.  Cook the syrup for 10 minutes on low so the flavors of the cinnamon will infuse to the sugar syrup.  Remove the syrup from the stove top and allow to cool. Remove the cinnamon sticks from the syrup after it has cooled.
When the baklava is cooling but is still warm poor the honey syrup over the baklava.  The baklava will absorb the honey syrup in about 10 minutes. This dish can be served immediately or can be stored in a cool dry place covered for up to 3 days.


Chopped Nuts in Food Processor


Brushing the Phyllo Dough with Butter


Nuts, Cinnamon and Sugar Mixture


Spreading the Nut Mixture Over the Phyllo Dough


Cutting the Phyllo Dough Before It Is Cooked


Honey Sugar Syrup


Baklava


Oregano Chicken Salad with Sliced Avocado

I try to cook a roast chicken about once a week.  This week I roasted a chicken with fresh oregano under the chicken's skin.  I then proceed to use the roast chicken leftovers the next day to make Oregano Chicken Salad.  You can use any left over pieces of chicken meat in this dish.  This dish is packed with protein, good fats and fiber.  Try it for lunch today and see how quick you can make a delicious lunch.

Oregano Chicken Salad with Sliced Avocado
Pre-heat Oven:  325
Makes:  6 sandwiches

1 tablespoon fresh Oregano finely chopped
2 cups of roasted chicken pieces chopped
2 celery stalks diced
1/2 cup sliced almonds toasted
1/4 cup mayo
1/4 cup sour cream
1 teaspoon salt
1/4 teaspoon fresh ground pepper
3 whole wheat or multi grain bagel
2 avocados sliced
6 pieces lettuce

Place the sliced almonds on a cookie sheet and bake at 325 degrees for 7-10 minutes or until golden brown.  Remove the almonds from the oven and allow to cool.
In a bowl mix the diced roasted chicken pieces, chopped fresh oregano, diced celery, salt, pepper, mayo, sour cream and almonds together.  Refrigerate for 1/2 hour.

Assembling the sandwich:
Slice the avocado in half and remove the seed and outer shell, then slice the avocado halves. Slice the bagels in half and toast in the toaster.  Place the bagel on a plate, then line the bagel with fresh lettuce. Place one scoop of oregano chicken salad on top of the lettuce and then place the avocado slices on each side of the chicken salad.


Toasted Sliced Almonds


Roasted Chicken Pieces


Oregano Chicken Salad with Sliced Avocado

Wednesday, December 16, 2009

Gingerbread Cookies

During the Holiday's many people turn to make Gingerbread cookies with their kids.  I had the pleasure to be in Florida this Thanksgiving with my mother, cousins, Aunt and lots of kids.  Are family tradition is to make ginger bread houses or gingerbread cookies.  This year my mom made the gingerbread dough and allowed all the kids to bake and decorate the gingerbread cookies.  The kids loved rolling, cutting and decorating the cookies with grandma.  My cousin's little boy kept coming over to our hotel room and asking if he could see the gingerbread boys.  He was very concerned that we would not eat his beloved cookies that he had decorated so diligently.

If you have family coming into town this holiday season you can make a batch of this gingerbread dough up a head of time and keep it in the refrigerator for up to 3 days.  When you are ready for the kids to make the cookies just flour your counter and allow the kids to roll out the dough with a rolling pin.  Then let the kids use the cookie cuter to cut out there own gingerbread boys or girls.  Place the cookies on a cookie sheet and bake according to the Betty Crocker recipe.  Allow the cookies to cool on a piece of foil or wire wrack.  When the cookies have cooled continue to decorate them with different colors of icing and different colors and shapes of sprinkles.  My kids loved the red hots for eyes and the green frosting.
Eat and enjoy these delicious holiday cookies.

Since I did not make this recipe I will give you the web sight to find it.
Go to: Gingerbread Cookies Recipe from Betty Crocker and down load this terrific recipe.


Cutting Out Gingerbread Cookies

Rolling Out the Gingerbread Dough


Gingerbread Cookies Cooling


Decorating Gingerbread Cookies


Decorating Gingerbread Cookies


Almond Crescent Cookies

I am sorry I have not blogged lately but I had the flue all last week.  I am sure you are all getting ready for the Christmas/Holiday season.  This almond crescent recipe is a holiday must.  These almond cookies will disappear before your eyes.  My husband even went to Costco for me to buy the almonds, helped form the cookies into crescents and powder sugared the cookies.  This recipe comes from the Baking Book from Linda Collister and Anthony Blake.  This recipe will get your whole family involved when you go to shape the crescent almond cookies and powder sugar them.  Enclosed is the recipe for one batch of almond cookies.  If you want to double, triple or quadruple this recipe that works great.  I usually will make around 150 cookies at a time and freeze them in cookie tins layered with parchment paper.  The only change I made to these cookies from the original is add whole wheat pastry flour to the recipe instead of all purpose flour.  These cookies are packed with almonds so not only do they taste delicious they are packed with protein and fiber.

Preheat Oven:  325 Degrees
Makes:  2 dozen cookies

1/2 cup unsalted butter
2-3 drops almond extract
1/2 cup confectionary sugar
pinch of salt
1/2 cup + 2 tablespoons whole wheat pastry flour
1 1/3 cups ground almonds
1/2 cup extra confectionary sugar for dipping the cookies

In an electric mixer with a paddle attachment, whip the butter and almond extract together until creamy about 1 minute.  Slowly add the confectionary sugar, salt and pastry flour.  Grind the almonds in a nut grinder or cuisinart until they resemble a course meal.   Slowly add the ground almonds to the dough and mix until blended.

Place a teaspoon of dough in your hands and shape the cookie dough into a crescent shape.  Place the cookies on a parchment lined cookie sheet. Bake the cookies in a 325 degree oven for 16-19 minutes or until golden browned (I like my cookies to get a rich brown color because it brings out the toasted almond flavor in the cookie). Let the cookies cool on a wire wrack.  Then place the cookies on a piece of parchment and sprinkle the cookies with powder sugar on both sides.

If you want to freeze the cookies just place the cookies in a parchment lined cookie tin and freezer for up to 1 month.


Almond Crescent Dough


My Daughter Sampling the Cookie Dough

Shaped Crescent Dough


Powder Sugaring the Almond Crescent Cookies


Almond Crescent Cookies Ready to Eat

Wednesday, December 2, 2009

Christmas Sugar Cookies

This is my families favorite Christmas cookie.  During the Christmas season I have to hide these cookies in tins around the house and freezer because I can't ever make enough Christmas sugar cookies to satisfy this crew.  I found this recipe when I was in culinary school at Johnson and Wales in Providence.  I was at a book store and did not have enough money to buy the cookie book so I just wrote down the recipe on a scratch piece of paper.  The only change I have made to the recipe over the past 18 years is to use whole wheat flour instead of all purpose flour.  I use King Arthur's white whole wheat flour that is unbleached and not bromated.  King Arthur's white whole wheat flour is made from a hard white wheat berries that give it a unique flavor that is milder than most whole wheat flours but has the same amount of fiber as traditional whole wheat flours.

Christmas Sugar Cookies

Preheat oven:  375 degrees
Makes:  50 cookies

1 cup butter
1 cup oil
1 cup white cane sugar
1 cup confectionary sugar
2 eggs
2 teaspoons vanilla
4 1/2 cups whole wheat flour (King Arthur's white whole wheat)  or white flour
1 teaspoon baking powder
1 teaspoon cream of tarter
1/2 teaspoon iodized salt

In a mixer with the paddle attachment whip the butter, oil, white sugar and confectionary sugar together for 2 minutes.  Scrap down the sides and continue to whip for 1 more minute.  Add the eggs one at a time to the butter and sugar dough.  Add the vanilla, baking powder, cream of tarter and salt to the dough.  Slowly add the flour 1 cup at a time to the cookie dough.  Cover the dough with plastic wrap and chill the dough for 2 hours in the refrigerator or 1 hour in the freezer.

Roll the chilled dough out on a floured counter top with a rolling pin until the dough is 1/4" thick.  If the dough sticks just sprinkle the dough, counter and rolling pin with a little more flour.  Cut the dough with your favorite cookie cutters (3" cookie cutters will yield 50 cookies).  Place the cookies on a cookie sheet lined with parchment paper.  Bake at 375 degrees for 9 - 10 minutes or until golden brown (I like my cookies brown so they have a nuttier taste).  Remove cookies from the oven and allow to continue to cook for 1 more minute on the cookie sheet before they are moved to a cooling rack to cool.  When the cookies are cool you can decorate them.

Cookie Icing:
1 bag of confectionary sugar (2#)
2 teaspoons vanilla
1 teaspoon fresh lemon juice
4 tablespoons cold water

In a large bowl mix the confectionary sugar, vanilla, lemon juice and cold water together with a whisk.  If the icing is too thick you can slowly add several drops of water.  If the icing is too thin you can add some additional powder sugar.

Decorating the Christmas cookies:
Take the cut out cookies and dip the top of the cookie into the bowl of icing.  Allow the icing to drain off for 3 seconds in the bowl.  Then place the iced cookie on a counter covered with parchment paper or foil.  Decorate the cookies with different colored Christmas sprinkles.  These cookies will freeze well.  Just let them sit for 1 hour before you pack them in freezer bags or tins so the icing has a chance to set.


Christmas Sugar Cookie Dough


Christmas Sugar Cookie Dough Rolled out to 1/4" thick


Cutting The Cookie Dough with Cookie Cutters


Mixing the Icing


Dipping the Cookies in the Icing


Christmas Sugar Cookies


Tuesday, December 1, 2009

Banana Cream Pie with Black Bottom Crust

I hope everyone had a terrific Thanksgiving.  I was in Florida for the holiday's and did not have a chance to blog.  I did make some delicious gingerbread cookies with all the kids, grandma and cousins and will be blogging about that this week.

Banana Cream Pie with Black Bottom Crust is a family favorite.  Most kids love pudding, whip cream and bananas.  This recipe has all these savory ingredients delivered in a chocolate covered crust.  Since the crust is coated in chocolate the crust stays nice and crisp and will not get soggy.  The original recipe comes from the Martha Stewart Baking Handbook but I changed the recipe so it is lower in fat by using none fat milk instead of whole milk and lowered the sugar amount from 2/3 cup to a 1/2 cup.

1 store bought crust in a metal tin
1 large egg plus 4 egg yolks
1/2 cup organic cane sugar
5 tablespoons cornstarch
3 cups none fat milk
1/4 teaspoon iodized salt
2 ounces of dark chocolate chips
1 cup heavy cream
2 teaspoons vanilla extract
3 bananas sliced

Preheat oven:  400
Cut out a piece of parchment paper that will cover the crust and fill the parchment paper with 2 cups of dry beans.  Bake the crust at 400 degrees for 10 minutes.  Remove the parchment paper and beans and cook the crust for an additional 8 minutes or until the crust is golden brown on all sides.  Allow the crust to cool.

Whisk the egg yolks together in a bowl and set aside.  In a saucepan place the milk, cornstarch, salt and sugar and whisk together on medium high heat.  Whisk the milk liquid until it simmers.  Remove the pan from the heat.  Take one cup of the hot milk and whisk it into the egg yolk mixture (continue whisking or you will have scrabbled eggs).  Then take the egg yolk mixture and slowly add it back to the hot milk saucepan while whisking at all times. Bring the mixture back to a simmer about 2 -3 minutes or until the custard has thickened.  Pour the custard into a small bowl.  Then place the bowl of custard into a ice bath. (An ice bath is a bowl of ice water).  This will bring the temperature of the custard down quickly.  Stir the custard to release the heat and allow the custard to cool in the ice bath for 10 minutes.  Then place the custard in the refrigerator wrapped in plastic wrap to cool.

Melt the dark chocolate chips in a microwaveable bowl for 45 seconds.  Stir the chocolate chips with a spoon and microwave again for 45 more seconds.  Remove the bowl and stir the chocolate chips again.  If the chips are not yet melted put the bowl back in the microwave for 30 more seconds and stir.  Brush the melted chocolate onto the pie crust with a pastry brush.  

Whip the 1 cup of whipping cream one high until it is almost whipped then add the 2 teaspoons of vanilla.  Continue to whip the cream on high until you have stiff peaks.

Assembling the pie:  Take the painted chocolate pie crust out and place it on the counter.  Place the sliced banana on top of the crust then add the custard and spread around the pie evenly.  Add the whip cream on top of the custard.  Slice and eat the pie immediately or refrigerate the pie for later.


Painting the Crust with Melted Chocolate


Custard with Painted Chocolate Crust


Placing the Bananas in the Pie


Banana Cream Pie with Black Bottom Crust

Wednesday, November 18, 2009

Fresh Sage Carrots

I made these fresh sage carrots for a vegetable last night.  My kids said the fresh carrots tasted good which was a surprise since they usually put cooked carrots at the end of the list of favorite vegetables.  This vegetable you can make up ahead of time since you blanch the carrots first and saute then at the last minute if you are entertaining.  By saute the carrots at the last minute before they are eaten they will remain crisp and flavorful.  I was inspired to make these carrots by picture in Cooking Lights November 2009 issue but lost the recipe so I made it up.  I hope you like it as much as my family did.

Serves:  6

4 large carrots peeled and sliced
5 fresh sage leaves chopped
2 tablespoons olive oil
1 teaspoon sea salt divided
Fresh black pepper

Wash, peel and slice carrots on a cutting board (if you have small children you can slice the carrots in half length wise and then slice the carrots).  Chop the fresh sage leave removing any additional stem.  In a large pot cook the sliced carrots in 1/2 teaspoon salted boiling water for 4 minutes.  Strain the hot water from the carrots and then place the carrots in a cold water bath (a cold water bath is a bowl filled with ice water).  Soak the carrots in the cold water for 4 minutes and then drain.  Pat the carrots dry on a paper towel removing all the extra water.  Saute the carrots in 2 tablespoons of hot olive oil for 3 minutes.  Season with the fresh sage, 1/2 teaspoons salt and fresh ground pepper.  If you want to serve the carrots latter just refrigerate the carrots after the ice bath until you are ready to eat.  Then saute the carrots when you are just about to sit down for dinner.  This will ensure your carrots are hot and crunchy and not mushy.


Sauteing the Carrots with Fresh Sage in Olive Oil

Rack of Lamb with Fresh Rosemary and Garlic Crust

Rack of Lamb with Fresh Rosemary and Garlic Crust is one of my husband's favorite dishes.  It was my husband's 41st birthday last week so I went about preparing this delicious Greek dish.  This dish is impressive for company during the holidays or for a special treat for your family.
The flavor of the fresh rosemary and garlic give the lamb a uniques flavor and a crunchy crust.  Fresh rosemary and garlic are essential in preparing this dish.  You can slice the rack of lamb in the kitchen or present your guests with the whole rack of lamb on a platter and slice the lamb at the table.

Pre-heat:  Grill
Serves:  6

2 racks of Lamb (8 bones)
6 fresh garlic cloves peeled and diced
4 Tablespoons fresh rosemary leaves chopped
1 tablespoon Kosher salt
Fresh cracked pepper
2 tablespoon olive oil

Rinse the lamb under cold water and pat dry with paper towel. Peel and dice the garlic.  Place the kosher salt on a cutting board with the garlic.  Use the back of a french knife and smash the garlic and the salt to make a paste.  Remove the rosemary leaves from the stem and finely chop the leaves.  Rub the garlic paste, olive oil and the rosemary over the lamb racks.  Evenly pepper the lamb racks.  Place the lamb in a container and leave in the refrigerator covered for 1 hour.  When the grill is hot add the lamb racks and cook for 5-7 minutes on each side until well browned.  Lamb should reach an internal temperature of 140 degrees (rare).  Don't worry if some of the lamb bones are charred at the end and chip off.  Let the lamb rest for 15 minutes before you cut the meat.  Slice the lamb with a serrated knife on a cutting board.


Smashing the Garlic with the Back of a French Knife


Lamb with the Garlic and Fresh Rosemary Rub


Cooked Rack of Lamb Sliced and Ready to Serve